Sidcar-injector Deployment and Usage
Introduction
Sidecar is a way to run alongside your service as a second process. The role of the sidecar is to augment and improve the application container, often without the application container’s knowledge.
sidecar is a pattern of “Single-node, multi container application”.
This pattern is particularly useful when using kubernetes as container orchestration platform. Kubernetes uses pods. A pod is composed of one or more application containers. A sidecar is a utility container in the pod and its purpose is to support the main container. It is important to note that standalone sidecar doesnot serve any purpose, it must be paired with one or more main containers. Generally, sidecar container is reusable and can be paired with numerous type of main containers.
For design pattern please refer
Example: The main container might be a web server, and it might be paired with a “logsaver” sidecar container that collects the web server’s logs from local disk and streams them to a cluster.
Manual sidecar injection
In manual sidecar injection user has to provide sidecar information in deployment.

Automatic sidecar injection
Sidecars can be automatically added to applicable Kubernetes pods using
mutating webhook admission controller Note that unlike manual injection, automatic injection occurs at the pod-level. You won’t see any change to the deployment itself.
How it works
sidecar will deploy along side with main container as shown below
The figure shows the client and server communication using mesher as a sidecar.
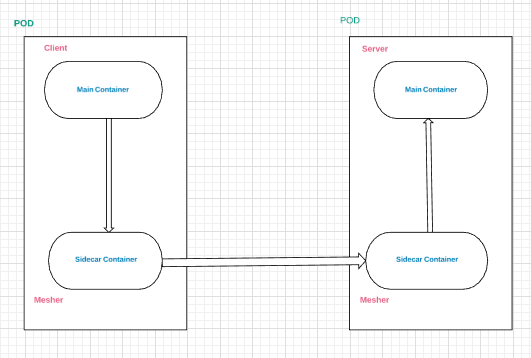
Explanation:
Mesher is deployed as a sidecar along with main container of server and client in a pod.
client and server will implement some rest api’s and functionalities like loadbalance, circuit-breaker, fault-injection, routerule, discovery etc… will be provided by mesher(sidecar).
workflow:
user/curl—–>client(main container)—–>mesher(sidecar container)—–>mesher(sidecar container)—–>server(main container).
Deployment Of Sidecar-Injector
Use below links to build and Install sidecar
Deployment of application
The Sidecar-injector will automatically inject mesher containers into your application pods.
Following are the annotations used to inject mesher sidecar into the user pod
sidecar.mesher.io/inject:
The allowed values are “yes” or “y”
If “yes” or “y” provided the sidecar will inject in the main container. If not, sidecar will not inject in the main container.
sidecar.mesher.io/discoveryType:
The allowed values are “sc” and “pilot”
If value is “sc” it will use serviecComb service-center as a registry and discovery. If value is “pilot” it will use the istio pilot as a discovery.
sidecar.mesher.io/servicePorts:
serviceports are the port values of actual main server container append with “rest or grps”
ex: sidecar.mesher.io/servicePorts: rest:9999
- Required annotation for client and server
- sidecar.mesher.io/inject:
- Optional annotation for client and server
- sidecar.mesher.io/discoveryType:
- Optional annotation for server
- sidecar.mesher.io/servicePorts:
Prerequisites before deploying application
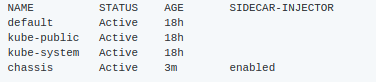
Label the chassis namespace with sidecar-injector=enabled
kubectl label namespace chassis sidecar-injector=enabled
kubectl get namespace -L sidecar-injector
Usage of istio
To use istio following are the required annotation to be given in client and server yaml file sidecar.mesher.io/inject: “yes” and sidecar.mesher.io/discoveryType:”pilot”
deploy the examples using kubectl command line
kubectl create -f <filename.yaml> -n chassis
Usage of serviceComb
To use service-center following are the required annotation to be given in client and server yaml file sidecar.mesher.io/inject: “yes” and sidecar.mesher.io/discoveryType:”sc”
deploy the examples using kubectl command line
kubectl create -f <filename.yaml> -n chassis